Project Members
Managing internal collaboration is done through the Members tab, where you can control which organization members have access to a specific project and define their level of authority.
Written By Jasen Fici
Last updated 7 months ago
Accessing Project Member Management
To view or update your current project team:
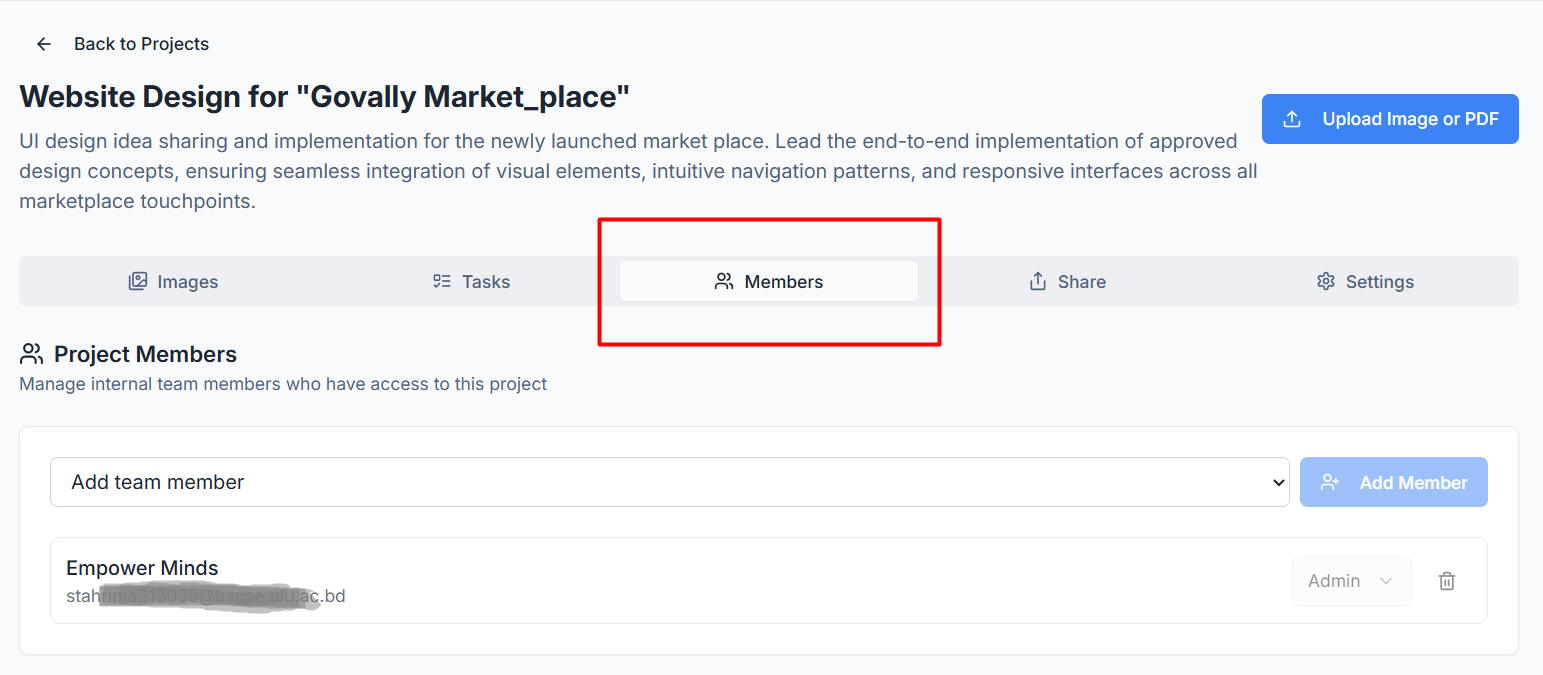
Open the specific project you wish to manage from your dashboard.
Click on the Members tab located in the top horizontal navigation menu.
Adding Team Members to a Project
You can grant access to any existing member of your organization directly from this dashboard:

Search and Select: Click the Add team member dropdown menu to see a list of available organization members.
Finalize Access: Once a member is selected, click the blue + Add Member button to officially add them to the project workspace.
Managing Roles and Permissions
The member list displays all active participants, their email addresses, and their assigned roles. Roles determine what actions a member can perform within the project:

Role Assignment: Use the Role dropdown next to a member's name to set their permission level, such as Admin or User.
Admin: Grants full access to manage project information, settings, and member lists.
User: Typically allows for contributing to annotations, comments, and tasks based on project-wide permissions.
Revoking Access: If a team member no longer needs access to the project, click the trash can icon on the far right of their row to remove them from the project immediately.